Showing posts with label Tutorial - Mixed Media Background. Show all posts

Wednesday, February 13, 2013

January Faith Art - Artist Trading Cards


Hello friends!  A quick post today to share my January artist trading cards for the "52 Card Pick-up" group.  I didn't sign up for the class til late january so I'm playing catch up.  The class / group is taught by Stephanie Ackerman.  Stephanie had the idea to alter a deck of playing cards.  I've been working on trying to fill up my Revolving ATC holder for a while now, so all my cards will be for that.  If you check out Stephanie's blog you will see she loves faith art and the grunge look.  She is known for using hearts as her main element on projects.   If you need some inspiration to get you started on a project like this then please join the class.  Details HERE.  There are lots of creative ways you can use your cards beyond the standard ATC's.

Create them to add to the front of cards or scrapbook layouts.  Make a mini album out of them.  One member is doing a set for her grandson.  Use some of them as book marks.  The sky's the limit.


As a part of the class she creates an ATC each week, and share's some techniques or idea's that she uses to create hers.  But you can do what ever you like.  I have a lot of stamps .... so my first cards will focus on how I can use them to create faith art cards .... like the Hero Arts chair image above.  And I LOVE butterflies, so I will try to make them the thing that I try to work in as much as possible.


Normally ATC's are 2.5" x 3.5" and if I were doing a swap I would stick to that.  But since this is for my Revolving ATC holder, I'm making them a little wider to compensate for having to punch the notches to attach them.  So I am adding 3/8".  


The other fun thing about doing them for me is that I can hang things over the edges without the constraints of the standard 2.5" x 3.5" size, like the ruffle on card #1.

Tips of idea's for creating my cards :

Card #1
1.  Spray book paper and add random stamp patterns in black ink.
2.  Stamp heart on green tissue paper.  Use tissue paper to create a ruffle and then stamp polka dots over it.  
3. Use oil pastel to add that grunge look (Stephanie shares another product that she uses for this).
Stamp Image : SU

Card #2
I created this background a while back and shared the tutorial HERE.
Stamp Image : Hero Arts

Card #3
This one is just patterned paper with script stamp over it.  One of the things I like to use to add just a little random pattern to a background is the "Rollagraph" stamp wheel by Clear Snap.  I know that SU sells them as well.  It allows you to lightly apply the image / ink in small area's. So when I talk about randomly stamping the background with an image I've either used my Rollagraph wheel or added ink to a background stamp only in small area's.  Hopefully that makes sense.  
Stamps : Gina K. Designs

Card #4
Consider creating a background by typing the words over and over again and then printing them on your paper.  I used words from a new Christian song by Colton Dixon "You Are"

On the back of the card I'm either printing the full bible verse or some personal journaling about what the verse means to me.

Hope you have a blessed day!!
hugs, Melisa

You can check out all my Faith Art HERE
You can check out all my ATC's HERE
You can check out more background inspiration HERE

Saturday, December 15, 2012

Designing with Masking Tape

2.5" x 3.5" Artist Trading Card

Hello paper crafters.  Today I want to share a couple of ways to use masking tape on your projects.  It can be used to create a distressed background as seen in the ATC above or to create your own decorative tape as shown on the ATC below.

2.5" x 3.5" Artist Trading Card

I am really enjoying using the ATC Sized Background stamps by Pink Persimmon.  I used the script image from "Fairy Tale" on ATC #1 ... and 3 other background patterns on ATC #2.  Hop on over to the Pink Persimmon store HERE and check out all the options!

Now get that masking tape out and get creative!!
Have a great day,  Melisa

*****************************************************


Project Details

ATC #1 
Stamps : Pink Persimmon "Fairy Tale" (script background image) and "Fine and Dandy"
Check out Pink Persimmon stamps HERE.
Spray Ink :  Glimmer Mist 
Ink : Brilliance "Pearlescent Brown"
Masking tape
Gesso


Cover ATC with masking tape.


Tear edges of masking tape strips and continue to layer.


Cover with gesso. (you can also use acrylic paint)  


Distress the surface by gently rubbing with a finger and peeling back some of the edges of some of the tape.


Spray with ink.


Rub cream colored acrylic paint on with a finger here and there and around edges.


Stamp with script background and brown ink.  I applied the ink to the image with a dauber over specific area's of the image (I didn't want to stamp the entire image). 


I didn't intend for the brown to be so prominent, so I wiped some off with a paper towel.  Just keep layering paint / ink until you get the look you want.  I ended up rubbing on a little more cream colored acrylic paint.

Stamp male image, color, trim and adhere to ATC front.  Stamp, trim, and doodle around words.  Adhere to ATC.

ATC #2

Stamps : Pink Persimmon "Springtime" (polka dots image), "Fairy Tale" (script  and floral image), "Spelling Bee" (words image), "Little Red Wagon" (girl image),  "Soda Pop Alpha"
Check out Pink Persimmon stamps HERE.

Masking Tape
Acrylic Paint (orange, purple, aqua)
Patterned Paper : Memory Box "Jubilee" 6 x 6 paper pad (green) and Pink Paislee "365 Degree's" 6 x 6 paper pad
Markers : E23, E25 (hair / shoes), Y38 (bow), E000, E00, R00 (skin)
Brilliance "Pearlescent Chocolate"

Stamp polka dot background image with yellow ink.  Paint strips of masking tape with acrylic paint.  I save the little plastic sheets that my clear stamps come on, so I applied the tape to these before painting.  You can put the strips on any surface that will be easy for you to remove after paint is dry.  After it's dry, stamp background patterns on them.  Tear and add to card.  Ink edges in brown.  Stamp girl on white cardstock, green patterned paper, and orange patterned paper. Color hair and skin, then trim girl from white cardstock.  Paper piece dress / socks-shoes.  Color over the green shoes with brown marker.  Stamp letters, trim, doodle around edges and adhere to ATC.


Thursday, November 29, 2012

Background Tutorial!


2.5" x 3" Artist Trading Card

Good morning friend.  "Whoo" wants to see another background tutorial???   I want to try and share one a month for a while.  I used this technique on a Artist Trading Card, but you could use it in a altered journal or card as well.  I designed this one using another one of Pink Persimmon's fun ATC Background stamps.  They have 4 different sets.  This one is from "Fairy Tale".  


I also used "Wise Old Owl".  The images in this set are solid and the body parts separate. So you can really get creative and stamp different body parts in different colors.  Here is one that I stamped but haven't had time to use on a card yet.


See what I mean??  He comes with a party hat as well.  Too cute!

Whoo wants to give this technique a try??  Stay tuned for another background tutorial in December!

Hope you find some time to get creative today,
hugs, Melisa


You can check out more Background Tutorials HERE.
You can check out more Mixed Media projects HERE.


****************************************************

Project Details

Stamps : Pink Persimmon  "Wise Old Owl"  and "Fairytale" ATC Sized Background
Check out Pink Persimmon stamps HERE.
Spray Inks : Glimmer Mist "
Ink : VersaMagic "Tea Leaves", Brilliance "Pearlescent Chocolate", VersaMagic "Turquoise Gem"
Glitter Glue : Studio G (Joann's)


Trim watercolor paper 2.5" x 3.5" (I didn't realize it until I went to put mine together that the one above was larger.  That's why the final project has part of the branch cut off).   Spray with aqua and yellow inks.  Stamp Fairytale background image with green ink.  Ink edges with brown ink.

Spray watercolor paper with yellow spray ink.  Stamp owl body and head with brown ink then trim.  Stamp wings in brown ink, trim, and adhere to owl body.  Stamp crown / eyes, trim, and adhere to owl body.  Stamp branch if you like the partial swirlies of the final project.  Stamp branch / claw image across bottom of owl image.  Adhere owl to background.  Add glitter glue to crown.  Type words, print, cut, and doodle around edges.  Adhere to ATC.

Friday, October 26, 2012

Background Tutorial !

2.5" x 3.5" Artist Trading Card

Hello paper crafters!  Today I am sharing an Artist Trading Card with a background technique that can be used for your card making as well.  I designed this one using Pink Persimmon's "Vintage Cupcake" and "ATC Background Springtime".

Check out Pink Persimmon stamps HERE.

Hope you are inspired to try this technique!
Melisa

You can check out all my background tutorials HERE.
You can check out all my ATC's HERE.
You can check out all my Pink Persimmon projects HERE.

*****************************************************

Project Details

Stamps : Pink Persimmon "Vintage Cupcake" and "ATC Background Springtime"
Check out Pink Persimmon stamps HERE.
Patterned Paper :  Authentique "Essentials Collection" 6 x 6 paper pad (blue)
Ink : VersaMark Watermark Ink
My Mind's Eye Miss Carolina 6 x 6 paper pad (pink)
Butterfly Punch : Martha Stewart
Floral Punch : EK Success
Chalk : Pebbles Inc.
Glue : Aleene's Tacky Glue
Glitter : Recollections Extra Fine Glitter


Draw 2.5" x 3.5" rectangle on the back of patterned paper.


Trim inside the lines with deckled scissor, and ink edges.


Trim slightly smaller piece of white cardstock.  Stamp background image with VersaMark Watermark Ink.  Let it dry for a few minutes.  Rub chalk over background.  Ink edges and adhere to trimmed pattern paper.  I love the softness of the chalks.


Stamp cupcake once on white cardstock and once on patterned paper.  Color cupcake brown and trim.  Trim cupcake liner, ink edges and adhere to cupcake stamped on cardstock.   Apply thick white glue to icing.  If it flows over lines, use a tooth pick to remove.  Sprinkle with glitter.  Punch flowers x 2,  layer, and ink edges.  Punch butterflies, color butterfly body,  then ink edges.  After icing has dried, embellish with punched flower. Add pearl to flower center.  Adhere to background.  Type word's, cut, ink edges, doodle around edges, and adhere to ATC.


See ya next month with another ATC / Background tutorial!


Friday, October 12, 2012

Mixed Media Cardboard Art Tutorial


Hello mixed media fans.  Today I"m sharing an altered cardboard project I created a while back after taking a class called "Burlap and Clay by Sue Pelletier.  Sue is a very talented and published mixed media artist and you can check out more of her artwork on her blog HERE.   


The class I took from her was offered on her NING site HERE.  You can email her with questions at sue38wood@comcast.net to find out how to purchase the class.


Lots of texture on this project !  I used white burlap and "crinoline" from Joann's Fabric store, along with paper clay, cardboard, and tissue paper.  


I'm going to share some step by step photo's of  how I created the background since my background / style is so different from Sue's.  Basically what I took away from the class was the idea to use burlap / crinoline / and clay on my project and then made it my own, using some of my favorite mediums.

Before I share the details of my project, I want to share with you Sue's new online video class, available over at "Creative Workshops".  I haven't taken it yet, but hope to do so soon.  These canvas's are so cool and she uses plaster, a medium I have never worked with.    Sue has her own unique style!  I have to say I haven't seen anything like this out there yet.

**************************************************

Project Details


I started with 3 pieces of corrugated cardboard and tore away peices of the to layer.  I added some white paint here and there, then sprayed with blue and yellow ink.  


I distressed the background use my Rollagraph - Clear Snap Stamp Wheel.  I like it because it's easy to apply the image here and there randomly, without applying the full image.  


Then I designed where I wanted the burlap / crinoline / and book paper on each panel.  I sprayed the crinoline and burlap with spray inks, and added some stitching.


Then adhered the pieces to each panel.


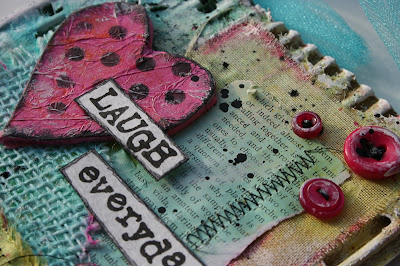
I rolled out my paper clay and cut my heart shapes.  After the clay air dryed, I painted the hearts pink.  Then I decided I wanted more texture so I used another one of my favorite mediums ... tissue paper.  I adhere pink tissue paper over each heart, purposely wrinkling it up.  


I made them look more distressed by lightly rubbing on some white acrylic paint randomly, and then black ink.  Then I used stencils to add polkadots to some of them.  


After adhering clay hearts and words, I splattered with black paint.

Lots of messy fun with this project!!  Hope you are inspired to create your own corrugated cardboard art project.  You can view more of my cardboard art HERE if you want .   And I started a "Corrugated Cardboard" art group over on Flickr a while back.  I would love you to link up your corrugated cardboard art HERE.

Have a fabulous weekend!
Melisa

You can view all my Mixed Media projects HERE.
and background tutorials HERE.

Have a fabulous day!
Melisa

Sunday, April 15, 2012

Mixed Media Art Journal Project


I finished 2 more pages in my art journal today.  So much fun!  I started with color inspiration from the Color Throwdown challenge blog and added the scripture from this weeks Word Art Wednesday challenge.


1. I started with 2 gesso coated book pages.  I used a thin layer so that the words were visible.

2. Scribble some blue (#47 Lyra Aquacolor) over the background and then brush water on to spread the paint.

3. Lay stencil (I used a circular medallion from Layers of Color) and sponge on purple watered down acrylic paint over the openings on the inside of the medallion and very lightly around the edges. 
4.  Pounce on watered down yellow acrylic paint over sequin waste (punchanella). 

5. Smear on some green paint with finger.

6. Spray with Work Fixative and dry with heat gun.  May not have been necessary, but before I started layering more color, I wanted to set what I had already added.


7. Roll on brown ink (Brilliance Pearlescent Chocolate by Tsukineko) using Jumbo Rollagraph Stamp Wheel with the Floral Flourish image around edges and in a few area's in center. I didn't want the full image, so I rolled lightly. You could use any type decorative stamp, but I like that the Rollagraph makes it easy for me to lightly roll and get a partial image. 

8. Wipe brown ink around edges. I used a little water on my fingers to smear it.

9.  Apply white acrylic paint with bubble wrap.


10.  Stamp Stampendous Music Score  on watercolor paper multiple times with water resistant ink (I used Palette Noir and then ran the heat gun over it a couple of times just to be safe).  Brush watered down white acrylic paint over some of the music score images (for picket fence and flower centers) and yellow watereed down paint over the rest (for sun). 

11. Hand cut fence and sun pieces.  Scribble around edges of all pieces with brown #59 Neocolor II crayon and smear with ZIG H20 Brush.  LOVE these brush's!  They come in different sizes and I just wipe them off on paper towels in between colors.


12.  Tear green patterned paper and adhere along the bottom of pages.  Only adhere along the bottom edge so you can slip the ends of fence and stems in later.  Use brown watercolor crayon around edges of grass.

13. Adhere fence and sun.

14. Cut flower #1 / heart flowers from purple patterned paper. Brush on yellow watered down yellow paint onto watercolor paper and cut flower #2.  Cut all flower centers from the white music score paper created earlier.  Cut leaves / stems from green patterned paper.  Add / smear brown watercolor crayon around edges of all pieces. 

15. Print scripture and cut into tag.  Tear one end.  Add / smear brown watercolor crayon around edges of tag.  Adhere tag to page and add bow.

16. Adhere stems, leaves, and flowers.  Before adhering leaves, crumble and crease.  Adhere ends of grass to page.  Embellish with buttons.  Doodle.

Thanks for stopping by!!
Melisa

See all my MIXED MEDIA TUTORIALS HERE
See all my MIXED MEDIA / COLLAGE PROJECTS HERE
See all my ART JOURNAL PROJECTS HERE
View all my Faith Art projects HERE.

*****************************************************

Linked to :


A Crafty Soiree


****************************************************

Challenges


Word Art Wednesday (wed) - Psalm 28:7
For Fun (wed) - tags (handmade tag with scripture on it)
Little Red Wagon (wed) - spring
Crop Stop (thur) - buttons and bows
Lily Pad (fri) - flowers
Crafty Emma's (sat) - paper piece
Inspiration Emporium (montly) - watercolor
Sketchbook Challenge (monthly) - open


Saturday, March 31, 2012

Artist Trading Card / Faith Art

Artist Trading Card 2.5" x 3.5"

Today I have an Artist Trading Card designed for this weeks Word Art Wednesday challenge.  Cass provides free word art each week for us to use in our projects.  Thanks Cass!!  I had fun getting my fingers messy with this one. 
hugs to you all!
Melisa

*****************************************************

Project Details

Trim watercolor paper to ATC size.  Mine is a longer than 3 1/2 because it's for my revolving ATC holder so I can extend things over the edges.  Stamp heart image (Hampton Arts) with VersaMark ink and heat emboss with clear embossing powder.  Brush on red watercolor paint (VanGough Permanent Red Deep) and blot some area's with paper towel so that it's not a solid color.  Let the first coat dry and then apply another coat.  Draw circles using a stencil (Crafter's Workshop).  Paint random dots black (Lyra Watercolor Crayon).  Paint around heart with black ink, smearing as you to.  Grunge up the heart a little by smearing on a very small amount of black here and there.  Create a mask (Eclipse Masking Tape) and carefully splatter on white watered down acrylic paint by loading a paint brush and flicking it over the ATC.  Ink edges with black ink and doodle.  Wrap with black twine and tie knot.  Adhere to revolving atc holder card.  Print word art, trim, ink edges, doodle and staple with Tim Holtz Tiny Attacher.  Embellish with stick pin (Maya Road) and trim (Hobby Lobby).  Print "true love", trim, ink edges, trim along top with deckled scissors and staple with Tiny Attacher.

**************************************************

Challenges

Word Art Wednesday
Southern Girls - focus on sentiment

You can check out my huge list of daily challenges by clicking on the "Challenges" tab at the top of my blog.  Let me know if I have missed any!


You can view all of my ATC's HERE
You can view more of my Faith Art HERE.

Wednesday, March 21, 2012

MIXED MEDIA / ART JOURNAL PROJECT


When I started the "Art of Wild Endangerment" class, I told myself I was going to just stick to sketching in a sketch book right now, because I seriously have sooooooo many other things I need to be doing.   But ....... the more I watched Junelle add her art to her altered book  .... I had to take the time to get my own started.  So I selected an old book, tore / cut out pages about every 4 page and started adding gesso.  I used gesso to adhere 4 page together at a time so my pages would be sturdy.  After I removed pages and adhere some together, I started adding gesso to all the pages and outside of the book.  Then I added my first sketch / art journal project!  I haven't journaled yet, but left space so I could add that later.  I'm addicted!  I have to work the next 2 days, so I really do need to get some house work done, teehee.  But I just want to work on my journal!  This is what my daughter would refer to as a "first world problem".

So I decided to take the time to share my step by step process, just in case someone is interested in giving it a try.  Below you can find my VERY long, and very boring explanation!  Other wise that's it for the day!  thanks for stopping by and I hope you have a joyful day creating!
hugs, Melisa

See all my MIXED MEDIA TUTORIALS HERE
See all my MIXED MEDIA / COLLAGE PROJECTS HERE
See all my ART JOURNAL PROJECTS HERE


*************************************************

Project Details 

I started out creating a blue background using water color paint and a "mop" paint brush.  I would put a little on and then use a paper towel to dab some off til I got the look I wanted.  I didn't wand a solid background on this one.  Not sure you can tell on the photo, but some of the white gesso is showing through. 


I had a old flourish stamp that had the cool deco leaves on it, so I used that as my inspiration and started by sketching (with a mechanical 07 pencil) flourish's.  Then I sketched the "deco leaves".  At this point you could just paint them in, but I decided I wanted to paper piece these.  Sooooo ...  I used tracing paper to trace each one, then positioned the traced deco leaf over the patterned paper.  After I was happy with where it was positioned over the patterned paper, I slid some carbon paper under the tracing paper and lightly penciled over the design, transferring onto the patterned paper.  Now you just trim and adhere.  I had to decide how I wanted to adhere the paper.  I could use Mod Podge, but that gets a little messy and usually ends smearing from underneath whatever I gluing down, leaving a shiney area.  Or I could use my Aleene's Tachy Glue.  When I took Christy Tomlison's "She Art" class, she Mod Podged everything.  I think because she liked how she could continue to smear her Neocolors or other mediums over it.  She also applied the Pitt pens over the Mod Podge as well and then was able to smear it to add shadow / distressing.  So I decided to go with Mod Podge.  But at this point, I didn't cover the whole page, just used it to adhere my paper pieces.   The smaller leaves were much easier.  I did't bother sketching them, because that's such and easy shape to cut.  So I cut a bunch of them from differnet patterned papers, positioned them on the page, and adhere.  Next I used a green water color pencil add added paint over all my sketched stems / vines.  I didn't put the color directly on the page.  I wet my brush, wipe the end of the brush over the end of the pencil to pick up the paint and then apply it to the page.


Next I trimmed patterned paper to create the bird house and a few of the banner flags (green).  I didn't have the right color patterned paper for the other colors, so I applied watercolor paint to some watercolor paper and cut them.  I used a font stencil for the letters on the banner.  Punch little holes in the corners (Fiskar's 1/16" ?? I think) and ran jute through them.  Adhered those pieces on with Mod Podge as well.


I sketched my birds on watercolor paper, add watercolor paints, and trimmed.  Adhered with Mod Podge.  This was my first time sketching birds.  I used a couple of my stamps (the ones on the project I posted monday) to inspire me.


Junelle likes to add little splatters of color to her art.  She makes it look so easy.  Hers look way better than mine.  Basically I just soak a brush wtih watercolor paint and then lightly tap it over the project. 

Next I tried to do some doodling.  I had some new pens from Prismacolor and started with those.  Basically I was trying to outline / sketch the lines in now with a black pen / marker.  But it wasn't working out over the Mod Podged area's or watercolored area's (stems / vines).  I think I ruined my pens trying it, because they stopped writing  : (  and I haven't been able to get them going again.  I also tried my Micron Pens, same problem.  I'm not sure why.  Maybe I just needed to let it sit a little longer.  I thought the watercolored area's were dry.  I used the Prismacolor 03 pen and my sharpie on Monday's project over the watercolored background and they worked fine ???  I was very frustrated, because the heart of Christy and Junelle's art is their sketching / doodling with the pen.  The project just isn't finished without it.  So at this point I decided to Mod Podge the whole thing and try a pen Christy recommends.  Here's the problem with her pen ... you can only by it at her shop (seriously ... the company discontinued them and she had them specialed ordered) and they have a wider tip, which I'm not crazy about.  I prefer an 03.  But this pen will write on anything.  After I dried the Mod Podge, I decided to give one more pen a try,  a fine tip sharpie.  I had issue with that one as well : ( .  So I finally went with Christy's pen.  You can find it HERE

Next I used acrylic paint and punchanella to add the circles you see here and there.  I started wtih the brighter colors and then went over them with white paint to tone it down.

The set from the photo above is HERE.
Scarlett Lime actually has some Punchanella in a "texture" kit HERE.  Christy showed us how to use these pieces in her She Art class to add interest to our backgrounds. 

All that's left to do is add some journaling.

If you are new to mixed media and are interested in online classes.  Check out THIS post for a list of online classes (some of them FREE) I am aware of.


Related Posts Plugin for WordPress, Blogger...