Showing posts with label Theme - Butterflies. Show all posts

Monday, November 29, 2010

Layers of Color Forever Friends Blog Hop

Good Morning papercrafters.  Today I bring to you a card I have created for a very special friend.


I have been so very blessed since joining the Layers of Color Design Team.  Not only does this company have a very special owner, Laura, but also some very special designers.  Not just for their papercrafting skills, but because of their love for Christ and love for their sisters in Christ.  From the very start of joining this wonderful team, I fell in love with Grace.  So today I am a little sad to say that Grace will be leaving us as a featured designer at Layers of Color.  But I am so very happy that she will be staying on as a "Friend of Layers of Color" and joining us when she can for special events.  I have enjoyed getting to know you Grace and hope that you will stay in close contact with us!
 This one is on the way to you via snail mail!


Inside sentiment says "Life is special with friends like you".
You can check out Grace's beautiful Layers of Color projects in her gallery HERE and her blog HERE .
As a tribute to our friend Grace, some of the other designers have also designed some cards just for Grace.  I hope you will take a minute to check them out.  


*************************************************************
Project details :
Stamps : Layers of Color "Wild Grass Frame" cling art stamp, and "Flutterescent" clear art stamp set.
You can shop for Layers of Color at http://layersofcolor.com
Ink : Tsukineko VersaMagic "Perfect Plumeria" and Hint of Pesto.  I used a white chalk pencil to add highlight over the green ink.
Spellbinders Labels #16
border punch - Martha Stewart
Jewels - Memory Box

Have a blessed day!
Melisa

Friday, November 19, 2010

MIXED MEDIA / ART JOURNAL


Good Afternoon papercrafters.  On a previous post I shared with you that I had been inspired by the "Inspiration Wednesday" video's by Donna Downey.   Every wednesday Donna explores different techniques and ways to apply color.  She does this in her "inspiration journal".  You can view a list of all of them on her blog HERE.  I am enjoying learning about different ways to apply color. 


I have decided to display my "journal pages" on my 7 Gypsies Photo stand and will share these with you as I create them. 

So for this page I started with water color paper.  Apply a water down yellow acrylic paint.  I used a green water color crayon around the edges.  I just colored it on and then added a little water with a wet paint brush, blending with the yellow.  I wanted it a little lighter in the middle so I used some white acrylic paint here and there til I got the look I wanted.  Next I used my Layers of Color Natural Flourish art stencil .  So easy to use.  I applied VersaMagic Tea Leaves with this in 2 of the corners.  My butterflies and the floral center in the large flower are from "Flutterescent" and "Flowering Gem" clear art stamp sets by Layers of Color.  I needed a center for the flower so I started digging through my stash and found this neglected pack of metal brads.  Just big enough to fit.  To tie everything in, I decided to add some gold around the edge of my frame (really old as well) and butterflies.  I think the ruffled ribbon works great for the stem and leaves.  The quote is from Inspirational Quotes.
The font style is totally inspired by Donna.  To finish it off, I used a charcoal pencil around the edges.

Thanks for stopping by and have a wonderful weekend!

Sunday, October 17, 2010

Altered Bird Cage Home Decor


Good Morning Papercrafters.  Today I am thrilled to have participated in the Stampin' Sisters for Christ Challenge.  I just love this challenge blog and wish I had time to play along more often.  These ladies are so very special in what they do on their challenge blog.  Each Sunday they provide a bible verse to inspire us!  In addition they have wonderful sponsors each week and this week the sponsor is Layers of Color!
Today's verse is ...
Matthew 6: 9-13 "This, then, is how you should pray: 'Our Father in heaven, hallowed be your name, your kingdom come, your will be done on earth as it is in heaven. Give us today our daily bread. Forgive us our debts, as we also have forgiven our debtors. And lead us not into temptation, but deliver us from the evil one."
And the challenge is ...
Make a card/project that features prayer; either someone praying, or a verse about prayer, or a greeting that lets someone know you are praying for them.
I had so much fun with this project.  My guest bedroom (when we get our new house in the spring, is going to be shabby chic).  I have already bought the bed linens and I want to fill the room with shabby pieces of art.  So here is another project for that room ...


I had so much fun creating this one.


1. Spray metal birdcage with white spray paint.  After this is dry, apply crackle paint.
2. Embellish with pearl trim (Hobby Lobby).
3. Add a branch (purchased in the floral department at Hobby Lobby) to the inside of the cage.  To make it look more realistic paint it brown and add brown crackle paint.
4. Add floral embellishment to outside of cage (Prima).
5. Stamp butterfly images, color, and trim. Apply black glitter with a glue pen.
6. Adhere to outside of cage.
7. Type bible verse and print.  Trim to a banner.


Aren't these butterfly images gorgeous??  They are from a Layers of Color set called "Flutterescent"!

You can view all of my Altered Projects HERE


Don't forget to hop over and play along with Stampin' Sisters for Christ this week!!

Have a blessed Sunday!

Thursday, October 14, 2010

More Layers of Color New Release Projects!!

Good Morning. Let me start out be reminding you that saturday morning Laura at Layers of Color will be announcing another drawing opportunity for more free cling mount stamps!!  Did I mention that some of them are compatible with Spellbinders Labels 14 and 16!!  Yep, LOC is a preferred partner with Spellbinders!  Two fabulous companies teaming up to bring you wonderful artistic products.
You can check out the details saturday morning at the Layers of Colors Blog.


I used another one of Layers of Colors new Cling Art stamps on this card! It's called Embroidered Butterfly. I also used Belle Brocade art stencil. I just love all the art stencils and techniques I've discovered using them. This was very simple. I stamped the butterfly image on the background and then created mask with my eclipse masking tape. I covered up the background butterflies with the mask and then layed the art stencil over them. I used a stencil brush and applied ink.


This is another one of the new cling mount art stamps that is compatible with SPELLBINDERS!!! I'm lovin' this! This is Floral Frame cling art stamp and it is compatible with Spellbinders Label 16.


You can check out all the Layers of Color New Releases HERE!
Each stamp has it's own gallery with lots of idea's for you.
Upcoming Events
Creative Cuts and More is having a big Holiday Blog Hop next week.  And you don't want to miss it!!  It will be October 20th, so stay tuned!
I hope you were inspired to create something this weekend!!
And remember that if you are inspired to create something based on any of my post, I would LOVE to see it.  Link me in the comments, or email me!

On a personal note :
We took our son out to dinner last night for his 23rd birthday!  Wow, I feel really old! 
And did I mention that I'm taking a 12 week long online class over at Big Picture Scrapbooking by the wonderful Donna Downey!!  I'm so very excited.  The class is called "Fun with Fabrics".  I hope they offer more online mixed media type classes in the future.  I'm am totally inspired to create some raw canvas art and can't wait to start sharing!!

See ya saturday morning with some fall stuff!

Friday, September 17, 2010

Altered Cigar Box


Last week I was searching for items I could use in my art, at a local antique store, and found this wonderful wooden cigar box for $2.50.  I also found some tiny bottle brush trees that I hope to use with a Christmas or winter scene in the future.  Pink Persimmon sells these adorable little chipboard houses, Vintage Colonial House by Melissa Frances and I have been wanting some.  Now I have to get them so I can use my little trees!!  Do you ever go to "antique stores" looking for great finds like these??  Not all of it is "antiques".  And you know what they say, "One man's junk is another man's treasure".  You have to be careful though.  Some of that stuff is priced crazy. 

I knew as soon as I seen the cigar box what I was going to do with it, because it has been one of those projects I've been planning on creating for a while.  I wanted to make a gift card set for my sweet mother-in-laws birthday in november and had been considering what I would store them in.


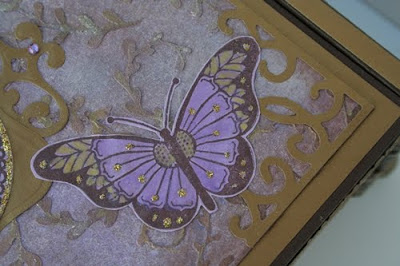
 I used "Butterfly Collector" and an art stencil - "Botanical Swirls",  by Layers of Color.


 If you have been following me for very long, then you know I LOVE butterflies.  And this set by Layers of Color is so gorgeous.  Especially that medallion.  Wanna see my butterfly shadow box I created earlier in the year??  Check it out HERE.  Sorry to get off subject, but it is one of my most favorite projects I have ever created and enjoyed seeing it as I walked through my diningroom this spring.  I even wrote a little poem to go with it with the intentions of creating a framed project using the poem, to set beside my butterfly box.  I'll have to add that next spring!

Tutorial
This project was a little messy to create, but worth it.  I could have just used patterned paper, but wanted more of a handmade, textured feel.  So, I created my own background. 


I honestly wasn't sure where I was going when I began the process and the end result was an accumulation of errors and layering color until I got the look I wanted.  So I will describe the process the best that I can, but know that what you should take from this is that sometimes you just have to sit down and play with color and mediums until you get the look you want.  My first panel turned out horrible.  But I learned from that and I'm very pleased with the results of my second panel. 

I started with a heavy cold pressed watercolor paper and trimmed to the size of the top of the box.  I watered down some acrylic paint, Making Memories Wisteria and brushed it over the paper.  I completely covered it with this wash and then let it dry.  Then I used my stencil to create some texture.  I used stencil adhesive, but the modeling paste is so thick, it might not be necessary.  Sorry, I haven't tested it.  With a palette knife (Just a plastic knife with a bent handle for easier handling.  Found in local craft store in the art section for about $1.  Well worth it, because that angled handled really helps) I spread light modeling paste (also found in the art section of local craft store) over the stencil.  Use the palette knife to level the paste and wipe off the excess.  Let this dry.  I really rushed mine and used a heat gun to help it along, because I had to move the stencil over to cover the entire panel.  You can see the raised area's created with the modeling paste a little better in this photo.


Next I realized I wanted two shades of purple.  So I used a stipple brush to pounce on another purple, Brilliance Pearlescent Purple.  These inks have just a little shimmer to them.  I inked up the Tim Holtz applicator tool with Pearlescent Chocolate and gently began adding it to the raised, modeling paste design.  Some of the ink got on the background, but that was ok.  I also distressed up the edges with it as well.  Then I decided I wanted to use gold as an accent, so I added a little gold pigment ink to the background.  It didn't really show up very well.  At this point I decided I had covered up too much of the lightest color purple I started with and began to pounce on some Brilliance Moonlight White to lighten some of the area's.  See how this process works, teehee.  And lastly I wanted the modeling paste swirls to stand out a little more. So I used a tiny paint brush and began adding Shimmerz Golden Wheat and Shimmerz Blingz Gold Glimmer here and there.  I didn't want to cover all of the swirls, because I wanted different shades.  By this time I had a mess and took a break to clean up the stencil / palette knife and my stipple brushes. 


I found a very old piece of DP in my stash by Colorbok that was a little lighter purple than the background.  I stamped my butterflies with Pearlescent Chocolate (This is my all time favorite brown ink.  I use it all the time, especially around the edge of images or projects to distress them).  Heat set.  Cut around edges with cuticle scissors (You have so much more control when cutting small images, or around curved lines, with cuticle scissors).  Add Shimmerz Golden Wheat and Lilac with a very small paint brush as shown.  If I got too much on a brown line, I used a tooth pick to scratch it off while it was still wet.  Add Stickles Glitz - Champayne to the little dots on the butterfly wings and on the body of the smaller butterflies.  Also add it to the outer border of the butterfly medallion.  Set this aside to dry.

Use Spellbinders Labels 1 and one of the Fancy Tags layered over one another to create a background for the butterfly pendant.


I realized that I needed  something in the corners so I found this really awesome Sizzlet set with decorative corners, Architectural Accents Set.  I think they turned out great!


After I finished the top panel, I painted the box brown.  I cut the side panels and ran them throught my Big Shot with a Cuttlebug embossing folder, then adhered them to the sides. I covered the top of the box with gold paper and then my butterfly panel.  I added these really awesome "feet".  They are by Tim Holtz.

There is nothing worse than having someone describe a process to you and not having an idea what they are talking about.  So, here are some photo's of some of the other tools I used to create this:


I like this stipple brush because the hairs are different lengths and soft.  Mine looks like this, but the handle is solid wood.  Unfortunately there is no manufacturer on the handle and I would love to find more of them.

I hope you were inspired to get really messy and try something new this week. If you find this tutorial inspiring and use it on a project of your own, I would love to see it!!
Thanks again for stopping by!

You can view all of my Altered Projects HERE
You can view all my Altered Cigar Boxes HERE

Wednesday, July 14, 2010

Layers of Color Scrapbooking!

Double post today, because I am double blessed!!  I'm am blessed to be on both the Layers of Color and Mark's Finest Papers' this month.

Today I am sharing projects I created using 2 of Layers of Color stamps sets.

This 12x12 Layout features "Joyful Noise" .   As soon as I saw this set I fell in love and new I would be able to use it for more than just card making, since my daughter plays the violin.  I used the butterfly, treble clef, and musical flourishes.  But there are 2 other stamps in the set, so take a peak at the link above.
I wish you could see it up close.  I used old music paper and distressed it to create the border along the side.  And the background DP is so cool.  All the flourishes are velvety feeling.


Frame Tutorial
I started by drawing the outlines of a rectangular frame on cardstock.  The outside measurement was 4 3/4" x 5 3/4"  and the inside was 3/4".  You want your pencils lines light enough to go back and erase later.  Then I stamped and embossed the musical flourish around the inside of the frame, allowing some parts to extend outside the lines of the frame.  I decided which parts of the flourishes that extended outside of the frame I wanted to keep.  I used an Exacto Knife and metal ruler to begin trimming along the pencil lines, making sure not to cut off the part of the flourishes I wanted to keep.  Then I used sissors to trim around the the parts that extended outside the frame.  The I adhered this peice to the brown paper and began trimming to create a mat.


Flower Tutorial
I made my own paper flower on this one.  Very simple to do.  I cut multiple sizes using my Spellbinders Scalloped Circles dies from old book paper.  Before cutting, I had colorized the paper using some pigment ink.  I simple folded over and layered the different scalloped circles until I got a shabby look.


The card below features "Royal Birds" and "Touch of Elegance".  These images are just a sneak peak of the whole sets, so make sure you click the links about and check them out!


Frame Tutorial using Spellbinders
Begin by tracing around the edges of a Spellbinders die - Classic Frames on patterned paper or cardstock using a marker to create the frame.  Then stamp the decorative swirlies at the top and bottom.  Trim around the inside and outside of the frame.  


I have had so much fun designing with these stamps, they are just gorgeous!!

Thanks for stopping by!

Wednesday, May 26, 2010

Creative Belli Challenge #92 - Flat Embellishments

Hello.  Wow I can't believe it's been 2 weeks since I posted.   Good to be back.  This is Creative Belli Challenge week.  This challenge blog inspires you to use up OLD embellishments you have laying around.  And I have tons of them because I'm a hoarder.  So the Creative Belli Challenges are perfect for me.

This week the challenge is to use FLAT EMBELLISHMENTS and the SKETCH provided over at the Creative Belli Blog.  You can use stickers, rub-ons, die's, or anything else flat you are hoarding.  I chose rub-on sentiments by Making Memories.  There was actually a date on the package.  They are from 2004!  I've been hoarding for a very long time, teehee.


Stamps : Stampers Anonymous (scalloped border collage), Cornish Heritage Farms (polka dots), and Layers of Color Joyful Noise (butterfly) and Nature Walk (swirly)
Ink : Brilliance Rocket Red, VersaMagic Oasis Green.
Quickutz Swirly die
Rub-on Sentiments - Making Memories

I recently placed an order for some of the cool 3-D items over at Creative Cuts and More and decided to sticker one of those up as well. 


This particular gift bag is "Tuck and Close Bag #2-XL ".  I chose Coral - Stardream Chiara.  It's the shimmery pale coral color.  So I selected glittery stickers by K&Company to embellish it.  What I love about Creative Cuts and More is that you get to select from a HUGE variety of paper types and colors.  And with all the pre-scored lines, it took only minutes to create.
See ya next time!

Sunday, April 18, 2010

Clean and Simple Challenge


Ok, this was torture.  Again, I thought this was a cool sketch and all the samples over on the Clean and Simple Challenge Blog were fabulous!  And the white space on their samples looked great!
So why was this so hard?  teehee.  I started out with a piece of the floral paper for the center panel and after hopping over to the Clean and Simple blog realized that it was going to be too busy for this challenge.  I have to accept the "white space".  So as hard as it was for me I went with the white and punched the floral DP.  Then after I got through the "white space" drama, teehee, I had to resist inking everything up.  I just knew that this would look so much better if I rubbed on some orange chalk, ever so gently around the edges, but I resisted again.  Will I ever get comfy with Clean and Simple??  I sure hope so.  Because I have ALOT of birthday cards to make!!
If you have time, take a minute to hop through some of the participate cards.  I really enjoyed seeing it was used in different ways.  There were couches on one of them!

I also need to give credit to the Color Throwdown Blog!  Awesome colors, that I would have never used without a little nudge!

Also linking to :
Our Creative Corner - Butterflies

Have all you butterfly lover's seen the Mariposa Matstack???  It is soooo awesome!  Check it out HERE.  These pictures DO NOT do it justice.  You have to see it in person.
Yep I already have mine!  I got it 40% off at Joanns!

Thanks for the inspiration ladies!

Saturday, March 27, 2010

GinaK Designs - "Lovely Shelf"


Good Morning.  Today I'm sharing with you a wonderful stamp set called "Lovely Shelf". (once you get to the link, scroll down to check this particular set out)  I designed this one using the colors assigned at the
Copic colors I chose:
purple - BV02, BV04, BV08
green - G20, YG03, YG91
brown - E55, E35

The sentiments are really versatile.  You can fill in "aunt", "mother", etc.  There are also other sentiments, "Thanks for a lovely gift", "What lovely news", etc.  You can get this one from GinaK Design.  The designer is Nina Brackett and I really love some of her sets.  You can check out all of her stamp sets, digital paper lines, and Perfect Patterns line HERE.
Nina's Blog


Prefer digital images???  Check out Nina's digital stamp line at Squigglefly
I created this one for this week's color challenge over at StampTV.


This one is not my usual card.  I'm thinking I would have liked it better if I had a white background with black polka dots.  No time to change it now. 

Stamps :  butterfly - The Angel Company "Wishing Happiness"
sentiment - GK Designs
Patterned Paper - 7 Gypsies


Thanks for stopping by!

Wednesday, February 17, 2010

Butterfly in a Box


Good Morning!  Today I am sharing with you a Home Decor Project.  As I have mentioned many times, (and will do again for any new readers), I love to use my stamps to create many different type projects and I want to encourage you to do the same.  It's nice to walk through the house and see some of my favorite images on display.  Spring has arrived and it's time to bring out my altered birdhouses and I'm so excited to add a butterfly collection to my Spring Decor this year.  I am using this project for the Copic Creations "Coloring embellishments" challenge.  I colored the 1/2 pearls in window 4 and 5 for this challenge. Scroll down to see those windows.

Before I get to the details, I need to tell you that I am using this project for the Creative Belli Challenge to use butterflies.  But don't forget to hop over and check out the Belli Blog Give-away for this challenge!  $30 worth of stamps!  Check it out HERE!  We hope you will decide to join us for our butterfly challenge!

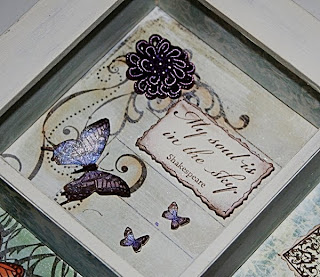
I spent alot of time working on this one.  I purchased the shadow box on sale at a local scrapbook store. It was solid black, so I started by altering the box, inside and out.  Then I brought out my butterfly binder collection and started stamping some of my favorite butterflies.  Next, I searced for quote, phrased that match.  Alot of what I used is from a Cornish Heritage Farms set called Vintage Butterflies.  Most of the rest of the products used are from The Angel Company. While I was working on my box, I wrote a little poem.  Now, I am NO WRITER, and I'm terrible at english, so try to restrain your criticism, teehee.
Here we go...

Yesterday I caught a butterfly and put him in a box,
So I could enjoy his beauty.

Today I heard a tap on the glass, and the butterfly said,
"M'am, this is not my duty".

He further expained, I have been ordained,
by the one who sits on high,
To share this beauty with many others,
by floating in the sky.

So, I let him out of the box.

Melisa Waldorf 2010

Alright, enough with silly poems!  Lets get to the detailed photos!

Window 1

Window 2


Window 3

Window 4

Window 5

Window6

Window 7

Window 8

Window 9
(quote by me!! and I thought is was very clever)

Window 10

Window 11

Window 12

Thanks for stopping by!

You can view all of my Altered Projects HERE
Related Posts Plugin for WordPress, Blogger...