Showing posts with label Theme - Birthday. Show all posts

Wednesday, August 17, 2011

The Craft's Meow


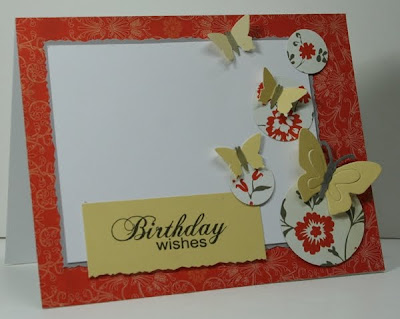
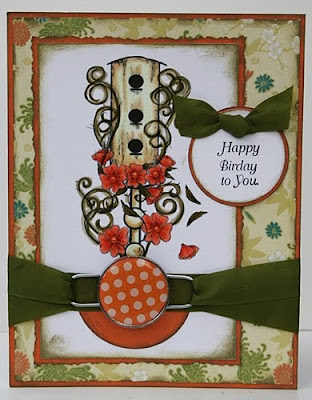
The Craft's Meow.  What a clever name for a stamp company!  Have you heard of this newer stamp company??  I say newer because it's actually been open for a couple of months now.  Some really great designs.  Nina Brackett is one of the fabulous designers and these cards were created using 2 of her sets.  You can check out all of The Craft's Meow products HERE.


 I kept these designs clean and simple because I want to include them in a class. 
hope you are having a fabulous week!
Melisa
**************************************
Project Details
Stamps : Butterfly Kisses and Fly Free
Patterned Paper : My Mind's Eye

*************************************

Challenges
Cute Card Thursday - clean and simple (card #2)
A Spoon Full of Sugar - birthday card
My Time to Craft - G is for ...  girl
Papertake Weekly - BINGO (I have button, ribbon, free space - card #2)
Stampanvie - girly

************************************

You can view more of my The Craft's Meow projects HERE.
You can view more of my Clean and Simple projects HERE.


Wednesday, July 27, 2011

Look who's one!

9 x 9 Layout

Who's this sweet little guy???  This is my son Travis 22 years ago, sitting in his grandmother's lap.  Look at those smiles!  It makes me smile just to look at them.  And look at Namaw, encouraging him to be bad and stick his hand in the cake.  I have to say, he never needed much encouragement.  He was my little stinker!

I don't know if you can tell, but there is a clown on the cake.  So I just new that my Pink Persimmon stamps would be sooooo cute on this layout, and I think I was right.  And these images would be perfect for birthday cards as well.  I used Vintage Cupcake and Small Banner set.  The cupcake set has lots of other cute toppers you could use and an adorable scalloped border.  This is the 3rd time I have used the small banner set and I can't wait to use it again.  There are several banner patterns to choose from and 2 other sentiments in addition to happy birthday.  Now I need the large banner set.
The Pink Persimmon website has a great gallery to inspire you.  But you can view the latest projects designed by the new design team by subscribing to the blog, HERE.  To sign up for their newsletter click the grey border across the bottom of the home page HERE.
Thanks for stopping by and letting me share a few of my memories with you.
Stop by tomorrow for a summer mini-album blog hop and some inspiration on how to scrapbook those summer photo's.
hugs, Melisa
**************************************************************
Project Details
Trim red cardstock 9 x 9" and ink edges with black ink.   Trim white cardstock 8 1/2" x 8 1/2" and ink both sides with black ink.  Adhere to red cardstock. Trim striped paper 8 1/2" x 3/4" and ink edges.  Create blue scalloped border with Fiskars border punch and adhere to underside of striped border.  Ink edges of scallops then adhere to bottom border of white cardstock.  Years ago when chipboard was so popular, I purchased a pack of 12" chipboard shaped borders and the scallop was one of them.  I never used the actual chipboard scallop because I wanted to use it as a pattern.  That is how I created the scalloped border along the top.  I did a search and found that a chipboard company named Magistical Memories has one HERE.  Stamp cupcakes on white cardstock and on colored cardstock or patterned paper.  Color cupcake with Copics.  Trim liners from colored paper and adhere to front of cupcakes.  Normally I use Liquid Applique to add dimension for icing, snow etc.  But I'm out, so I decided to try something new.  I used my Aleene's Tacky Glue.  It's so thick allowing me to build up the icing.  If I got in on the line, I used a toothpick to remove it.  Sprinkle with glitter.  Stamp cupcake toppers, color with Copics and adhere.  Set aside to let icing dry.  Stamp banner, trim, and punch mini holes in eash corner.  String with floss.  Paint chipboard letters for the "one".  Arrange / adhere photo's and decorative elements.  Stamp "look who's" using the SodaPop Alpha set.

****************************************************************************

You can view more of my Scrapbook Layouts HERE.
You can view more of my Pink Persimmon projects HERE.

Monday, January 3, 2011

For a Sweet Friend

Good Morning Papercrafters!
This is a birthday card for a very sweet friend and I was totally in my happy place creating it!


I also want to take a moment to introduce you to 2 new Layers of Color Designers.
We have been waiting patiently to announce that

JESSICA FICK and DIANA QUEEN
have joined Layers of Color!!!!
************************************************************

Project Details
Stamps - Layers of Color Flowering Gems
Embossing Folder - Cuttlebug
Cardstock - Bazzill, DP unknown
Envelope - Making Memories Vintage Kit
Paperclip - Tim Holtz
Pearls - unknown
Bingo Card - Jenni Bowlin
Lace - Webster's Pages
Ribbon - Teresa Collins
Doily local craft store - ink with Palette Haystack and a really old Making Memories pad from a distressing kit.

*******************************************************

Making the world a more colorful with Layers of Color!

Layers of Color is proud to be a Spellbinders Preferred Stamp Company and we all love and use the Grand Calibur!

You can now upload your LOC projects to our Flicker group HERE, and find tons more inspiration.
And please join us on Facebook HERE.


Please join us for our NEW RELEASE blog hop Jan 17th.  Each Designer will be giving away a stamp set!

*****************************************************

On a personal note ...
We have been living in a rental since we moved to Texas and we have started looking for a house.  We found a really good deal on one and may be making an offer this week.  We would appreciate you prayers.  It's scarry buying a re-sale house, since you don't know if there are some hidden issue with it.
We are so READY to get out of this rental though.  1400sq ft with my adult son, 2 dogs and 2 cats has started feeling like a cracker box.  And my sweet daughter has been sleeping on the couch when she comes to visit.  2100sq ft would feel like a mansion!

I will be back on Wednesday and Friday with some Valentine projects!
See ya then!
Melisa

Tuesday, November 9, 2010

Day 2 of the Fruits of the Spirit Blog Hop

Welcome to Day #2 of the Layers of Color / 2 Sketches 4 You "Fruit of the Spirit" Blog Hop!I'm so glad you were able to stop back by and visit again today.
I have to tell you that I was up late last night finishing my project (It's 3:30am as I'm posting! slacker), so not alot of writing today.  Please be patient because some of the designers may not post til a little later this am.


 If you missed the post yesterday where I explained what this hop is all about, then please scroll down.  And remember that Layers of Color is sponsoring the 2 Sketches 4 You challenge blog this week.  So hop on over and see what you have to do to qualify to win a free stamp set!


Thank goodness for challenges or I probably would not have finished this one.  They really help to give you direction, so if you are every low on mojo, I highly recommend them!

*****************************************************************

Project Details
I used "Fruitful Harvest" from Layers of Color again today.  What a beautiful art stamp set.  I stamped it on old book paper.  I colored with my copics, then added a little shimmerz and glitter.  You can see a hint of the shine in the photo.  Before doing all that detailed trimming, I added some glue on the back to create support for those branches and leaves hanging off the side.
DP is 7 Gypsies Nottinghill 6x6 Paper pad which I think I got from Mark's Finest Papers earlier in the year.  Ribbon - May Arts.  That cute little button is from a local craft store and is by "Dress it up" - Au Jardin.  It's a cute little pack of vintage looking colored buttons.  And I'm so excited, I used my new Spellbinders die set - Lacey Circles - for the first time.  I LOVE this set!!

Here are the other participates for today's hop!

and you may want to check the blog's of 2 other DT members for their announcement of winners from yesterday's drawings:
Thanks for stopping by and I'll see you tomorrow!

Thursday, October 14, 2010

More Layers of Color New Release Projects!!

Good Morning. Let me start out be reminding you that saturday morning Laura at Layers of Color will be announcing another drawing opportunity for more free cling mount stamps!!  Did I mention that some of them are compatible with Spellbinders Labels 14 and 16!!  Yep, LOC is a preferred partner with Spellbinders!  Two fabulous companies teaming up to bring you wonderful artistic products.
You can check out the details saturday morning at the Layers of Colors Blog.


I used another one of Layers of Colors new Cling Art stamps on this card! It's called Embroidered Butterfly. I also used Belle Brocade art stencil. I just love all the art stencils and techniques I've discovered using them. This was very simple. I stamped the butterfly image on the background and then created mask with my eclipse masking tape. I covered up the background butterflies with the mask and then layed the art stencil over them. I used a stencil brush and applied ink.


This is another one of the new cling mount art stamps that is compatible with SPELLBINDERS!!! I'm lovin' this! This is Floral Frame cling art stamp and it is compatible with Spellbinders Label 16.


You can check out all the Layers of Color New Releases HERE!
Each stamp has it's own gallery with lots of idea's for you.
Upcoming Events
Creative Cuts and More is having a big Holiday Blog Hop next week.  And you don't want to miss it!!  It will be October 20th, so stay tuned!
I hope you were inspired to create something this weekend!!
And remember that if you are inspired to create something based on any of my post, I would LOVE to see it.  Link me in the comments, or email me!

On a personal note :
We took our son out to dinner last night for his 23rd birthday!  Wow, I feel really old! 
And did I mention that I'm taking a 12 week long online class over at Big Picture Scrapbooking by the wonderful Donna Downey!!  I'm so very excited.  The class is called "Fun with Fabrics".  I hope they offer more online mixed media type classes in the future.  I'm am totally inspired to create some raw canvas art and can't wait to start sharing!!

See ya saturday morning with some fall stuff!

Wednesday, September 1, 2010

Creative Belli #99

Good Morning.  It's time for another Creative Belli Challenge.  This week we are challenging you to drag out an old forgotten stamp and use it.
I am using one of my really old Technique Tuesday sentiment stamps and Close To My Heart stitch stamps.  These are 5+ years old.  The butterfly is newer from "Butterfly Collector"set by Layers of Color.


The card base is by Creative Cuts and More.  It's one of their "gift cards" and has slots on the inside to hold a gift card.  See photo at bottom of post.


We would love to have you join us over on the Creative Belli Blog.  Hop on over and check out all the DT inspiration and play along!

Wednesday, August 4, 2010

Happy Bird-day!

Good Morning!
I have some fabulous news to share!  I have been ask to stay on the permanent DT for Layers of Color!  I'm so excited.  I just love their Art Stamps.  And today I am introducing you to another set, "Happy Birdday".  This set just makes me smile. 

And I'm using for today's Creative Belli Challenge.  Yes, it's been two weeks and it's time to use some of your old neglected supplies.  Today's challenge is to use paint on your project.  And my paint is REALLY old, so I was surprised it wasn't dried up.  I used some of Making Memories - "Spotlite".  It's a lime green color.  We would be thrilled if you joined us in this week's challenge.  Please hop on over to the challenge blog for all the details on how to play and to view all the wonderful inspiration that the designers have created.  I will also list their links at the bottom of the post here.


I wanted to created my own background and I had no idea where is was going with it when I started.  See the pattern in the background???  It's one of Layers of Color Art Stencils.  If you have never seen them, then hop over.  The patterns are gorgeous.  And so easy to use.  This pattern is called "Vintage Medallion".  I cropped mine up a little.  The actual stencil pattern is actually larger.

Tip / Technique - Create you own background
 I layed my stencil over a pale pink piece of cardstock and stenciled on Palette Bordour Blush.  Then I ran it through the cuttlebug creating the raised dots.  Next I lightly began to apply my green paint with my finger.  And lastly I lightly rubbed some brown ink to help the dots to pop off the background.  Seriously, this took only minutes to do.  And I love it!!  I didn't have to search for DP!

And then my little bird images just finished it off perfectly.  The green folded ribbon is by Pink Paisley.  Picked it up a while back and so glad I finally used it.
Thanks for stopping by and I hope you will join me again for more Layers of Colors projects!

Saturday, July 31, 2010

Creative Cuts and More - Birthdays and Cupcakes

Good Morning!  August 1 begins my fun Guest Designer gig with Creative Cuts and More and my goal is to show you how awesome and easy these products are.
Creative Cuts and More sells pre-cut/pre-scored die cuts.  There products range from simple image die cuts to AWESOME 3-D templates to pre-cut mini albums, and much more!!  If you have ever wanted to create 3-D boxes or bags, this is the way to go.  All you have to do is fold along the scored lines and adhere.  She carries a HUGE list of colors for you to select from.   And why am I so excited?? Because I have always secretly admired all those cool boxes and bags over at SCS, but was to lazy to try it!


This project is a Cupcake Box.  Perfect to drop off on a co-workers desk or give to a friend.  It comes with this cool insert to hold the cupcake in place and an acetate window.   I put together my box and began embellishing.  I decided to cut panels in a lighter shade of pink and run them through the cuttlebug with an embossing folder.  And then I distressed with pink ink that matched the box.  Then I glued the pom-pom fiber around the edge of the lid.

Now another great option would have been to stamp the box, but keep in mind that you would have to do that before folding.


Here is a birthday card I created using the Circle Window A2 card and Cupcake #01 - Small  x 4 ( two pink and two white).  Scroll down for a detailed tutorial.
I'm linking this one to the July Caardvarks challenge to create a Birthday card.


These cards come with different shaped windows for you to choose from.  The pink glitter on the icing on the inside didn't really match, but you get the idea.  And as you can see, I lined up the cupcake on the inside so that it is not visible from the outside.


Tip / Tutorial

The Card Front
To create the embossed front of the card begin with a rectagular piece of cardstock that fits just inside the card  front, leaving a border.  Mine is 4 x 5 1/4.  Run it through the Big Shot using an embossing folder of you chose. 


Place this piece inside the card, lining it up directly in the center as shown below.  Close the card and with a pencil trace the circle on the embossed piece.  This becomes you guidelines for triming out a larger circle/ window. 


Select a Spellbinders circle die that is slightly larger than your guideline and line it up as shown below.  I use 2 small pieces of clear tape to secure the die in place.  Run it through the Big Shot creating a window larger than the one on the card.


Now your ready to get your fingers inky.  I used Regal Rose (SU) and lightly brushed it over the embossed panel.  With an eyeshadow applicator I brushed on a little Regal Rose aroung the edges as well.  Then I used an eyeshadow applicator to very lightly apply just a little black around the edges.  After it was dry I adhered it to the front of the card. 

The Cupcakes

I started with 2 pink and 2 white.  Cut the icing tops away from 1 of the white and 1 of the pink switch them up, layering the white icing over the pink die and vise versa.  Now your pink cupcake liner will have a white icing and vise versa.  DO NOT GLUE them down until you have stamped the liners.  Stamp both the liners with a decorative stamp.  I chose polka dots.  Ink edges black.  Color both candles black.  Cover the pink flame with white pigment ink.  Apply adhesive to both flames and sprinkle with glitter (Stampendous).  Now adhere the white cut out icing on the pink cupcake and vise versa.  I used Liquid Applque on my white icing but didn't like how it looked.  So I applied adhesive (Aleene's Tacky Glue) and sprinkled with glitter.  I did like that it was raised though. The dimension looks really cool.  I should have used my Puffy Paint (local craft store) instead of the Liquid Applique.  It would have been smoother and more like real icing.  Apply adhesive to the pink icing and sprinkle with glitter.  I used pink and it doesn't really match, I should have stuck with the white, because I think the pink would have still shown through the glitter and matched better. 

I used a piece of the lighter pink cardstock to create the label on the inside.  I placed it inside the card so I could plan the positioning of my sentiment.  I centered it up and helped to keep it in place by putting a small strip of tape runner on the back of it.  I was afraid I would mess up the sentiment, so that's why I waited to adhere it down.  Close the card.  Choose a birthday sentiment and slide your cupcake over the front to figure out the best position.  Stamp your sentiment.  If you got it right the first time, great (I had to do it twice).  Now you can adhere that inside label.  And adhere the cupcake to the outside.  Now you can slide the cupcake on the inside of the card until you get it directly under the one on the outside.  Glue it down  to the inside of the card.
Your done!!
Please stop back by this month to see all of my Creative Cuts and More projects.  If you miss one, go to the labels on my side bar and click on Creative Cuts and More.  This will bring up all my projects using their products.

You are invited to join the whole DT for a blog hop on August 12th.

Thanks for stopping by and I hope you have a blessed day!

Friday, July 30, 2010

Dare to Get Dirty Projects

So, as you may have read on an earlier post, that I have been crazy busy making projects for 33 challenges over at SCS for this years Dare to Get Dirty Contest.

It's only done once a year, they post challenges for 7 days for a total of 33 challenges, and you have to be a Fan Club member to play. Now, you didn't have to complete 33. But, there was a chance for 12 participates who complete ALL the challenges to win prizes, so I had to give it a go. Let me tell you this really pushed me. And I'm not a big fan of sketches, so those were to hardest for me. I have already posted some of those projects, but there were a few more I wanted to share with you (and a couple I don't, teehee). So today is a parade of some of these projects. The contest ends July 31 and I'm hoping that I am a winner!
You were able to combine challenges and I posted 19 projects total.


This one was a color challenge.  I have chosen to leave several of my cards without a sentiment on the front recently, so I can use them for whatever comes up.
Stamp sets : Flourishes Nurture Yourself (pot), Stamper's Anonymous (scalloped border), Great Impressions (swirly background), butterfly unknown
I gathered tissue paper to create my ruffled border.


I actually had stamped a couple of these images out a while back and colored, but never complete on a card.  Don't you just want to sit down and color sometime??  I have a pile of images that are colored and I just need to do something with them.  So I was thrilled to finally use this one.  This image is by Kraftin' Kimmie.  There is another image with it that is so cute.


This one was for a "movie challenge".  My daughter loves Audrey Hepburn and I had bought her this image a while back.  So it was a perfect fit.  Then I bagan googling quotes by her.  This one worked out well I think.
Stamps : B-Line Designs (Audrey), SU (background stamp)


For this shaped card I used a template I downloaded from Bee-Crafty Downloads.  Looked like a good idea when I down loaded it, but I turned it into a fiasco.  After I figured out to enlarge and printed it, I decided that I didn't like the thickness of the lines so I decided to paper-piece it.  But that meant that I had to draw the icing lines myself.  But after all the frustration, I think the outcome is ok.  I considered turning the cherry into a candle, but the practical side of me won out.  The cherry fits in an envelope.  BTW, I like alot of her templates, but just be aware that they are adobe files.  So it was a little tricky for me to figure out how to copy and paste it into a word doc so I could resize it.  If I had know, I wouldn't have went with this one.

Stay tuned for a blog candy announcement coming August 1st!

I hope your day is filled with great joy!

Thursday, July 15, 2010

DAY 3 - Mark's Finest Papers' Blog Hop

Good Morning!  It's Day #3 of the Mark's Finest Papers' Blog Hop and we are sharing projects with a stamp set called "Flourishes and Frame".  This one is loaded with beautiful sentiments and a wonderful set to add to your collection.

There are prizes to be won!!!  So make sure you scroll down to see all the details!

I put together a a birthday card and a little gift box.  This little matchbox is by Creative Cuts and More.  I love all the great 3-D items you can get from them.  Lots of gift containers already cut and scored.  All you have to do is fold and adhere.

Did you know that MFP carries cardstock, ribbon, and other embellishments to put the final touches on your projects!


If you like Spellbinder's then you will want to pick up a new set when you order your stamps.  Mark's Finest Papers' has 10 pages of them, so lots to choose from!


See ya tomorrow with more MFP!

Thursday, July 1, 2010

Altered Paper Mache Pot

Good Morning.  I am so excited to announce that I have the pleasure of serving as a guest designer for Layers of Color this month.  I will be sharing projects using several of their stamp sets this month.  Layers of Colors sells the most wonderful artisitc stamps with a vintage flair!  They also just released a line of Art Stencils that are fabulous.  Their design team has been showing off lots of idea's for using the stencils.  Their GALLERY is just loaded with awesome idea's to inspire you.  You can find more wonderful inspiration on the Layers of Colors BLOG.  Laura with LOC is making my guest DT announcement on her blog today, so if you get a minute to hop over and leave a comment, that would be awesome.
LAYERS OF COLOR

Today I am showing off "Nature Walk".


I thought this project would be a great gift for a co-worker or friend. They could sit it on their desk at work to brighten their day. The Birthday Wishes sentiment could be removed later. It's a fun and easy altered item. I picked up this paper mache' pot at a local craft store, covered it with old music paper and coated with a red glaze. You could probably create your own glazes by thinning down acrylic paint. But I have several colors made by Golden. I also have a bottle of "Golden Acrylic Glazing Liquid". I mix this with acrylic paint to create my own glazes. Glazes are fun because they are translucent and allow you to add color without covering up whats below.


I did add a decorative image from another LOC set called "Touch of Elegance".  I used it in the center of the smaller flowers. I found these fun fabric brads at Hobby Lobby. They are called "Spare Parts" and made by Paper Studio.


You can see the back doesn't look so great. I twisted green floral wire to create the stems. I punched white circles to help secure the wire to the back of my flowers. 

I will be sharing another altered project using Layers of Color stamps next wednesday!  So please stop back by.

You can view all of my Altered Projects HERE

Friday, June 11, 2010

Layers of Color - Merci Bouquet

This set by Layers of Color is so pretty.  It's called Merci Bouquet. 

I used Core'dinations cardstock.  It was brown on the outside and pink on the inside.  I ran it through the cuttlebug using one of their embossing folders and then lightly sanded.  I like that aged effect you get with this.   I rubbed on pink acrylic paint to distress it more.   I used a background stamp on the Spellbinders die cut and distressed it with brown ink and a stipple brush. 

I just love the stick pin I used on this one.  It's by Jenni Bowlin.

Thanks for looking and have a wonderful day!

Wednesday, May 26, 2010

Creative Belli Challenge #92 - Flat Embellishments

Hello.  Wow I can't believe it's been 2 weeks since I posted.   Good to be back.  This is Creative Belli Challenge week.  This challenge blog inspires you to use up OLD embellishments you have laying around.  And I have tons of them because I'm a hoarder.  So the Creative Belli Challenges are perfect for me.

This week the challenge is to use FLAT EMBELLISHMENTS and the SKETCH provided over at the Creative Belli Blog.  You can use stickers, rub-ons, die's, or anything else flat you are hoarding.  I chose rub-on sentiments by Making Memories.  There was actually a date on the package.  They are from 2004!  I've been hoarding for a very long time, teehee.


Stamps : Stampers Anonymous (scalloped border collage), Cornish Heritage Farms (polka dots), and Layers of Color Joyful Noise (butterfly) and Nature Walk (swirly)
Ink : Brilliance Rocket Red, VersaMagic Oasis Green.
Quickutz Swirly die
Rub-on Sentiments - Making Memories

I recently placed an order for some of the cool 3-D items over at Creative Cuts and More and decided to sticker one of those up as well. 


This particular gift bag is "Tuck and Close Bag #2-XL ".  I chose Coral - Stardream Chiara.  It's the shimmery pale coral color.  So I selected glittery stickers by K&Company to embellish it.  What I love about Creative Cuts and More is that you get to select from a HUGE variety of paper types and colors.  And with all the pre-scored lines, it took only minutes to create.
See ya next time!

Friday, May 7, 2010

Crafty Secrets - Birthday Kids


This set is so cute!

Stamps : Crafty Secrets Birthday Kids
Colorization : Copic MarkersInks - Brilliance and Palette
Patterned Paper : October Afternoon
Tools : Spellbinders oval and scalloped oval dies, Fiskars border punch,
deckles scissors
Trim and punch paper as shown. Distess edges with ink. Secure all paper together as shown. Stamp images and color with Copic Markers. Secure images poppin heads up a little. Add pompom fiber.

Are you a fan of Crafty Secrets??  You can check out all my Crafty Secrets Projects HERE.

Friday, April 30, 2010

Sweet 'n Sassy Birthday card


Good Morning!  Today I'm sharing one of Sweet 'n Sassy's digital images Chocoholic.   I needed another birthday card, so I had to create my own sentiment in a word document.  Looking at this makes me hungry, teehee.  It's been soooo long since I've had chocolate, but I've lost 20lbs!!  So it has been worth the to resist.

Thanks for stopping by!
Melisa

You can view more of my projects using Digital Images / Stamps HERE.
You can view more of my Sweet N Sassy projects HERE.
You can view more of my Birthday project HERE.

Tuesday, April 20, 2010

Another Birthday Card DONE! Woowhooooo!


So I have a little birthday card club going on this year, where I send them out to not just family and real life friends.  But I'm sending them out to tons of cyber friends as well.  Something new I'm doing this year and I have to say my plan is working well.  I have pre-addressed all the envelopes and wrote the birthday where the stamp goes.  Then I filled them in order in a basket.  At a glance I can see which date is coming up next.  If I had not organized it at the beginning of the year, I would have never followed thorugh.  So far, so good.  So now I just have to decide who gets this one.  Hopefully it will bring a smile to someone's face!

Isn't that 1/2 circle cute.  It's a little sprial bound booklet of papers you can tear out by Making Memories.  And the Background DP is from one of my K&Company Paper Pads.  I have really become addicted to the paper pads since I started making cards.  The sentiment is from a new "Birthday" sentiments set by Fiskars.  Use my 40% off coupon at Joanns on this one!  It has some really funny birthday sentiments in it.
The lady and the yellow lacey swirls above the sentiment are from one of those little ATC collage booklets.  A girlfriend gave me one of each of hers because they come 3 pages of each design.  Thanks Patty!!!

Sunday, April 18, 2010

Clean and Simple Challenge


Ok, this was torture.  Again, I thought this was a cool sketch and all the samples over on the Clean and Simple Challenge Blog were fabulous!  And the white space on their samples looked great!
So why was this so hard?  teehee.  I started out with a piece of the floral paper for the center panel and after hopping over to the Clean and Simple blog realized that it was going to be too busy for this challenge.  I have to accept the "white space".  So as hard as it was for me I went with the white and punched the floral DP.  Then after I got through the "white space" drama, teehee, I had to resist inking everything up.  I just knew that this would look so much better if I rubbed on some orange chalk, ever so gently around the edges, but I resisted again.  Will I ever get comfy with Clean and Simple??  I sure hope so.  Because I have ALOT of birthday cards to make!!
If you have time, take a minute to hop through some of the participate cards.  I really enjoyed seeing it was used in different ways.  There were couches on one of them!

I also need to give credit to the Color Throwdown Blog!  Awesome colors, that I would have never used without a little nudge!

Also linking to :
Our Creative Corner - Butterflies

Have all you butterfly lover's seen the Mariposa Matstack???  It is soooo awesome!  Check it out HERE.  These pictures DO NOT do it justice.  You have to see it in person.
Yep I already have mine!  I got it 40% off at Joanns!

Thanks for the inspiration ladies!

Thursday, April 15, 2010

FCD Blog Hop!


I designed this one using one of FCD's digital images.  I resized, then printed all the elements on pink DP.  The Circle fit perfectly in my Spellbinders circle die once I cropped it and reduced the size.  I had to play with it a little to get it right, but now I have saved and can use it over and over with it.  I cropped the smaller circles tightly and then reduced their size as well so they would work with my circle punches.  I really like this digital!  You can check it out here with all of FireCracker by Designs digital stamps HERE.

Every weekend FCD offers up a free digital image for you to download!
Check it out HERE.
FCD also has a newly  released "wedding/anniversary" stamp set as well.  You can check it out HERE.

It's time for another FCD Blog Hop.  The DT is doing a fun "Word Play" theme.
You can begin the Blog Hop HERE.
I know the girls will have some clever idea's for you.  And as always Pamela will be offering up something wonderful to give away!  So hop on over and find out what it is!

You can view more of my projects using Digital Images / Stamps HERE.

Wednesday, March 17, 2010

Creative Belli Challenge #87


It's time for another Creative Belli Challenge!
And this week the Belli girls want you dig into your stash and use some of those clips we all have.  Dig deep, I know you have some!  This is Creative Belli's first sketch challenge as well.  So to play along, hop over to the Creative Belli Blog. 

My clip was given to me as part of a blog candy package!  Since the paperclip ends extend from the sides, I couldn't  help but use my clip in another way! 

Don't you love this bird house image???  I fell in love with it the minute I seen it!  It's one of the new digital images from FireCracker Designs by Pamela.  Check them out HERE.  I colored it with my Copics, inked the edges and added some pearls.  Friday there will be a Design Team Blog Hop showcasing some of FCD's digital images.  Don't miss it!  And you can get a freebie HERE.

Sunday, January 17, 2010

Designing with Vintage Images / Stamps


Do you love vintage images??

Well then you want to check out the Digital Two for Tuesdays Challenge Blog.
Cora loves them and she spends time searching for them, repairing them and then sharing them with the rest of us.  Cora uploads 2 images weekly and challenges us to use one of them.  It's free to download them, and use them for your personal use.  Cora just trust that you will not post the image anywhere else and that you will link back to her since she is the owner of the image.  I played along one other time and created the Snowman project at the bottom.

Here are 2 cards using this weeks image and  one of last weeks images.
Cora also sells some really great vintage stamps.  I just ordered a set from her Etsy store and I can't wait to get them!  Here is a link to her ETSY STORE.

You can find the image on card #1 to copy and print HERE.
You can find the image on card #2 to copy and print HERE.


I used Epson ink to print these and then colored with my Copics without any problems.


This one I posted in my March of the Snowmen Blog Hop.  So you may remember it from there.  The image was posted on Digital Two For Tuesday back on December 1.

Wanna see what other projects I have created with Cora's free digi's??   Click HERE.

You can view more of my Vintage / Shabby projects HERE.
You can view more of my Winter projects HERE.
You can veiw more of my Corrugated Cardboard projects HERE.
Related Posts Plugin for WordPress, Blogger...