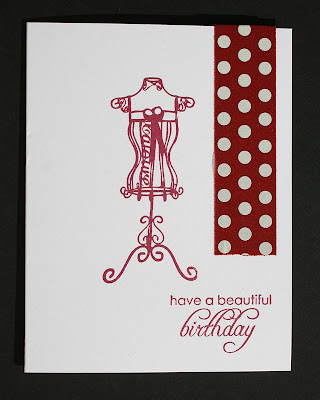
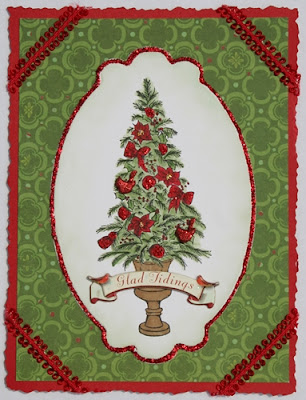
Showing posts with label Manuf - Gina K. Show all posts

Saturday, February 23, 2013

A couple of Gina K. Design cards


Hello friends.  I'm so glad it's Saturday.  We are hoping to fit a bike ride in later today with our daughter.  It's beautiful in Texas right now.  We are having our spring with high's in the 70's most days.  I spent some time organizing photo's this week, since I'm trying to get back into it on a regular basis.  The problem is that I love so many of the scrapbook products I see .... but so many of my photo's from years ago were in color .... and don't match.  Apparently orange and blue were colors my son looked great in!  I think I have to get over that feeling that everything has to match and just go for it.  I need grandchildren and more black and white photo's teehee.

I used to store my photo's in these plastic "Sterilite" drawers because it seemed like an easy way to thumb through them.  They were pretty much organized by year ... but a lot were not.  Sometimes I would pull multiple photo's out trying to match them up ... and then never file them back.  So there was a catch all drawer.  So I have filed 20 years of photo's in photo albums the last couple of months.  WHEW!  I have given up on an notion that I will scrapbook them all.  And who would want to sit down and look at that many scrapbook albums anyway.  I'm excited that I have them out of drawers and in albums where my family can flip through them and look at them.

I do have a couple of cards to share today I designed using some Gina K. Designs images.  I used "Retro Boutique"  on this one.  Isn't that dress so cute.  I wanted it to be something you would want to pull out of the closet for a special event.  I loved popping up the dress to make it 3-D.  It's hard to see, but I added a little black party streamer to create a ruffle along the bottom.  I also added some beaded trim (Hobby Lobby).  The patterned paper is from Hobby Lobby.  


I used "Garden Fresh" for this card.  I thought the plaid ruffle trim and raffia gave it a cute farm fresh feel.  This set comes with more cute fruit / veggies and phrases.

I hope you have a fun and fabulous weekend!
hugs, Melisa

You can check out all of my Gina K. Designs Projects HERE.

Wednesday, October 10, 2012

Gina K. Designs "The Magic of Christmas"


Good Morning!  Today I'm sharing a couple of projects designed using "The Magic of Christmas" stamp set by Gina K. Designs.


The Gift bag and box are by Creative Cuts and More.


It's never too early to get started on Christmas projects!

Have a great day!
Melisa

You can check out all of my Gina K. Designs Projects HERE.

***********************************************


Project Details

Gift box and gift bag : Creative Cuts and More
Ribbon : May Arts Silk Ribbon
Gems : Hero Arts
Tag: hand cut
Stamps: “The Magic of Christmas” GinaK Designs
Ink: Momento Tuxedo Black, VersaFine Crimson Red
Markers: Copic R29, R59
Tools : Deckled Scissors Fiskars

Christmas Gift Box :
1) Fold and adhere Creative Cuts and More (pre-cut and pre-scored) Square Box #10.
2) Wrap with ribbon and tie bow at top.
3) Hand cut tag using deckled scissors along the bottom of tag.
4) Stamp “joy”.  Create mask with Eclipse Masking Tape.  Stamp ornaments.
5) Color with Copic markers.  Ink edges.  Adhere to front of box.

Christmas Gift Bag :
1)      Stamp sled, snowflakes, and sentiment on front of Creative Cuts and More (pre-cut and pre-scored) Large Square Bag.
2)      Color sled with Copic markers.
3)      Embellish snowflakes with red jewels.
4)      Fold and adhere bag.
5)      Tie red bow around handles.

Card :

Stamps : GinaK “The Magic of Christmas”
Markers : Copic

Patterned Paper : The Girl’s Paperie
Glitter Glue : Stickles

Adhere front of card to back of a larger piece of red cardstock and then trim around the edges with deckled scissors. Trim cream cardstock and patterned paper and adhere to card front. Stamp ornaments on patterned paper and on white cardstock. Color, trim and adhere ornaments to card front. Stamp sleigh and snowflakes on a 2 ½” x 3 ¼” piece of cream cardstock. Adhere panel to red cardstock and trim around edges with deckled scissors. Adhere to card front. Stamp sentiment on a ¾” x 2 ½” piece of cream cardstock and adhere to red cardstock. Trim around edges with deckled scissors and adhere to card front. Add glitter glue to center of snowflakes and red dots on patterned paper.


Thursday, October 4, 2012

Gina K. Designs - "Springtime Silhouettes"


Today I'm sharing a set of clean and simple cards using GinaK Designs "Springtime Silhouettes".


Combined with some fabric tape these were very easy to put together.


And would a quick and easy set like this make a great gift set??
Thanks for stopping by!
Melisa

You can check out all of my Gina K. Designs Projects HERE.

********************************************

Project Details


Stamps : Gina K “Springtime Silhouettes”
Fabric tape : 7 Gypsies
Ink : Colorbox Fluid Chalk Maroon

Stamp image and sentiment. Embellish with fabric tape.


Friday, August 31, 2012

GinaK Designs "Springtime Silhouettes"


And here is my 3rd card for today ...  designed using GinaK Designs "Springtime Silhouettes".  I am really enjoying this set because it has so many little images and cute sentiments in it.

Well that's it for tonight!!  I'm off to bed.

You can check out all of my Gina K. Designs Projects HERE.

Thursday, August 23, 2012

Gina K. Designs - "Stars" with gesso


For this ensemble, I decided to focus on CAS and gesso.  The stamp set is "Stars" by GinaK Designs.  Isn't that star border die so cute!!  It's by Sweet n' Sassy.  It comes as a combo with a heart one as well.  


The large star is from a stencil.


thanks for stopping by!
Melisa

You can check out all of my Gina K. Designs Projects HERE.

*********************************************

Project Details

Card #1
Rock Star - 4 1/4" x 5 1/2"
All Stamps : Gina K. Designs "Stars"
Kraft Paper : Papertrey Ink
Patterned Paper : Cosmo Cricket 6 x 6 paper pad
Ink : Tsukineko Brilliance Red Rocket
Gesso
Star Stencil : Art Minds by Michaels

Dry brush on gesso where you want to stamp sentiment.  Trace large star on patterned paper with a stencil, trim, and adhere to card front.   Stamp stars, trim, and adhere to card front.  Stamp sentiment.

Card #1

Card #2

God's Promises - 4 1/4" x 5 1/2"
All Stamps : Gina K. Designs "Stars"
Kraft Paper : Papertrey Ink
Ink : Tsukineko Brilliance Red Rocket
Gesso
Star / Scallop die : Sweet n' Sassy

Dry brush on gesso where you want to stamp sentiment.  Cut star / scallop borderwith die and adhere to card front.  Stamp stars, trim, and adhere to card front.  Stamp sentiment.


Card #3
Good Friends - 4 1/4" x 5 1/2"
All Stamps : Gina K. Designs "Stars"
Kraft Paper : Papertrey Ink
Ink : Tsukineko Brilliance Red Rocket
Gesso
Star die : Sweet n' Sassy

Dry brush on gesso where you want to stamp sentiment.  Cut star / scallop border with die and adhere to card front.  Stamp stars, trim, and adhere to card front.  Stamp sentiment.


Thursday, April 19, 2012

GinaK Designs - Springtime Silhouettes

  
Today I'm sharing another Springtime Silhouettes card.  I am also using a fun flourish die from Cheery Lynn Designs.  I love that there are sooooo many companies making dies now.  So many choices and many of them to fit specific images as well.  Do you have any favories???  
Happy die cutting!!
Melisa

You can view all of my GinaK Designs projects HERE.

****************************************************

Project Details
Stamps : GinaK Designs "Springtime Silhouettes"
Ink : Tsukineko Brillance Pearlescent Chocolate
Die : Cheery Lynn Designs "Mega Fanciful Flourish"


Trim polka dot patterned paper ink edges and adhere to card front . Trim aqua patterned paper  and ink edges. Adhere cream cardstock on the back along top edge and trim with deckled scissors Adhere to card front. Adhere trim along bottom edge. Cut flourish and adhere to card front. Stamp image on cream cardstock and trim. Embellish with brown tuelle. Stamp sentiment on cream cardstock and cut with oval die 

Wednesday, April 4, 2012

GinaK Designs - "Springtime Silhouettes"


GinaK's Springtime Silhouettes has 9 different silhouette images in it.  So easy to stamp and no coloring necessary.   It also comes with 11 different sentiments that cover a wide range of themes.  So this one set, goes a long way.  Sentiments for friendship, birthday, encouragement, I'm sorry, and get well are just a few.  I have 2 more cards using this set in the works and can't wait to share more idea's for this one!

I kept this one clean and simple.  White space is hard for me, but I like how this one turned out.    I used up some really old ribbon and cardboard buttons from my stash.  That's always a good thing.  I used Spellbinders Labels Four.
I would like to invite you to join me tomorrow for the Sweet N Sassy blog hop.  Lots of chances to win free stamps!


Thanks for stopping by!
Melisa

You can view all of my GinaK Designs projects HERE.


Thursday, March 15, 2012

GinaK Designs "Springtime Silhouettes"


I have received several fun GinaK sets the last few months and just didn't have time to play with them. So that is my goal this month.  The cards I'm sharing today are designed using a set called "Springtime Silhouettes".  It's a fun set that includes images and sentiments for lots of occasions.  I love that the stamps are solid.  So you can whip up cards really quick.


Thanks for stopping by!!
Melisa

You can view all of my GinaK Designs projects HERE.

********************************************************

Project Details

Card #1
Stamps : GinaK Designs "Springtime Silhouettes"
Ink : Tsukineko Brilliance Pearlescent Chocolate
Die : Cheery Lynn Designs "Mega Fanciful Flourish"
Scissors : Fiskars Deckled

Adhere card to a larger piece of brown cardstock and trim around edgs with deckled scissors.  Trim patterned paper, ink edges, and adhere.  Cut 2 brown vines.  Cut 1 apart and use to add an extra swirl and leaves to the first one.  Stamp images with brown ink on cream cardstock, trim, and adhere.  Stamp sentiment.


Card #2
Stamps : GinaK Designs "Springtime Silhouettes"
Ink : Tsukineko Brilliance Pearlescent Chocolate and Pixie Dust
Stencil : Crafter's Workshop
Border Punch : Fiskars
Stick Pin : Making Memories
Embossing Folder Cuttlebug

Trim brown cardstock and adhere to card front.  Trim cream cardstock, emboss, ink edges, and adhere to card front.  Trim cream cardstock, emboss, ink edges, and adhere to card front.  Trim cream cardstock 3 1/4" x 4".  Apply pink ink over polka dot stencil, then ink edges with brown ink.  Tie a knot and wrap ends of brown ribbon around edges of panel.  Mat on pink cardstock.  Cut brown strip at least 3 1/2" wide and punch scalloped border on 1 end.  Adhere other panel and then trim 3 edges with deckled scissors.  Stamp sentiment with brown ink.  Stamp image with brown ink on cream cardstock, trim, and adhere.  Embellish with stick pin. 


Monday, October 17, 2011

GinaK Designs Christmas Projects


Good Morning Paper Crafters!  Today I'm sharing a bunch of GinaK Designs Christmas Projects I designed a while back.  This one is a Christmas ornament using A Very Merry Christmas and Lovely Labels 2.


Photo card using The Magic of Christmas.


And here is a card using A Very Merry Christmas


Have a great day!
Melisa


************************************************

Project Details


Ornament
Ink : Tsukineko Brilliance Rocket Red, Copic Markers
Grand Calibur
Patterned Paper : Little Yellow Bicycle
Glitter glue : Stickles
Chipboard
Gold cord : local craft store

Using Spellbinders Nestibilities Labels Sixteen, cut 2 green and one chipboard labels.  Adhere green labels to both sides of the chipboard.  Stamp Lovely Label image on white cardstock with red ink.  Trim around edges, leaving a border as shown.  Adhere to front of ornament with red ink.  Trim around edges, leaving a border as shown.  Adhere to front of ornament.  Stamp bells image on white cardstock and color with markers.  Adhere to front of ornament.  Stamp sentiment.  Adhere ends of ribbon / hanger to back of ornament.  Embellish with glitter glue. 


Photo Card 

Stamps : GinaK The Magic of Christmas
Markers : Copic
Patterned Paper : The Girl's Paperie
Ribbon : Stampin' Up

Trim off white cardstock 4 1/4" x 5 1/2".  Trim patterned paper slightly smaller and adhere to cream panel.  Stamp ornaments on patterned paper slightly smaller and adhere to cream panel.  Stamp ornaments on patterned paper and then again on cream cardstock.  Color ornaments with markers, trim around bulbs (do not cut hangers) and adhere over ornaments on patterned paper.  Trim photo down and tie ribbon around end of photo.  Adhere to cream cardstock and trim around edges leaving a border.  Adhere to re cardstock and trim around edges with deckled scissors to create a border.  Stamp sentiment on cream cardstock and trim.  Adhere to red cardstock and trime around edges with deckled scissors.  Adhere photo and sentiment to card front.


Glad Tidings Card

Stamps : GinaK Designs A Very Merry Christmas
Ink : Tsukineko Momento Tuxedo Black
Markers : Copic
Chalk : Pebbles Inc
Grand Calibur
Patterned Paper : The Girls Paperie Tinsel and Twig 2010
Glittered birds : Making Memories
Glitter Glue : Stickles
Chipboard sentiment : Bo-Bunny

Trim green patterned paper 4.5" x 6" and adhere to card front.  Trim white cardstock 4.25" x 5.75" and adhere to card front.  Trim red patterned paper 4" x 5.5" and adhere to card front.  Cut / emboss white cardstock using Spellbinders Labels Ten.  Stamp tree image and color with Copic markers.  Add green chalk around edges.  Add chipboard sentiment.  Embellish with glitter glue and glittered bird brads.  Adhere to card front.

Tuesday, September 27, 2011

GinaK Designs "So Grateful"


Here is a little fall inspiration for you today.  I know I said I was going to post a Christmas gift set, but I totally forgot that I had pushed that one forward for a "Gift's Galore" blog hop with Layers of Color in November.  Sorry.  Hope you like this one instead!  And I hope you are enjoying some fall like weather in your neck of the woods.  It was 97 here today!  Seriously.  Well, I do hate cold weather and while some of you were shopping for winter wear this weekend ....  I was laying out in the sun!

This is a REALLY cute fall set that I bought over a year ago called "So Grateful".   It comes with an apple card, pumpkins, and the cutest acorn border.  GinaK has another fall set I have as well.  It's called "Autumn Beauty".  So if you are still on the hunt for some fall images ..  hop over and check them out!

Have a great day!!
Hugs,
Melisa

You can check out all of my Gina K. Designs Projects HERE.

*************************************************

Project Details

Ink : Tsukineko Momento Tuxedo Black and
Brilliance Pearlescent Chocolate
Markers : Copic Chalk : Pebbles
Patterned Paper : The Paper Studio
Spellbinders Labels Two
Ribbon : Offray
Deckled Scissors : Fiskars

Trim brown cardstock 4 ¼” x 5 ½”. Trim patterned paper (The Paper Studio) 4” x 5 ¼”, ink edges with brown ink (Tsukineko Brilliance Pearlescent Chocolate) and adhere brown cardstock panel. Trim / emboss white cardstock using Nestibilites Labels Two (Spellbinders). Stamp image (GinaK So Grateful) on scrap white cardstock. Color with markers (Copic basket - E55, E57, pumpkins - E97, E35, gords -Y00, E33, leaves G61, G24, YG67, E33, E9, wheat - Y00, E33) and trim around all of the image except those little lines coming off the sides of the wheat. Stamp image again on the label. Do not color, this is to provide the lines coming off the sides of the wheat. Adhere colored image over this image. Stamp sentiment. Apply yellow and orange chalk (Pebbles Inc) around edges and image. Distress edges with brown ink and adhere to brown cardstock. Trim around label with deckled scissors (Fiskars). Tie brown ribbon around bottom part of panel (Offray). Adhere panel to front of card. Embellish with fall sprig (local craft store).


*************************************************

And here are a few other cards I made a long time ago using these sets.  And even though I'm not crazy about them, maybe you will be inspired by the images.  The photo's are old as well, I tried to fix them up a little.


Saturday, March 27, 2010

GinaK Designs - "Lovely Shelf"


Good Morning.  Today I'm sharing with you a wonderful stamp set called "Lovely Shelf". (once you get to the link, scroll down to check this particular set out)  I designed this one using the colors assigned at the
Copic colors I chose:
purple - BV02, BV04, BV08
green - G20, YG03, YG91
brown - E55, E35

The sentiments are really versatile.  You can fill in "aunt", "mother", etc.  There are also other sentiments, "Thanks for a lovely gift", "What lovely news", etc.  You can get this one from GinaK Design.  The designer is Nina Brackett and I really love some of her sets.  You can check out all of her stamp sets, digital paper lines, and Perfect Patterns line HERE.
Nina's Blog


Prefer digital images???  Check out Nina's digital stamp line at Squigglefly
I created this one for this week's color challenge over at StampTV.


This one is not my usual card.  I'm thinking I would have liked it better if I had a white background with black polka dots.  No time to change it now. 

Stamps :  butterfly - The Angel Company "Wishing Happiness"
sentiment - GK Designs
Patterned Paper - 7 Gypsies


Thanks for stopping by!

Wednesday, November 4, 2009

StampTV / Center Stage Spotlight DT Blog Hop!

Welcome to our first Center Stage Spotlight Design Team Blog Hop!
Blog Hop begins November 4th 10pm CST / 11pm EST
Jessica Fick, the Design Team Coordinator for GinaK Designs has issued a challenge to all of the past and present CSS team members to make a Christmas card with one of these sketches:


I used Magic of Christmas Stamp Set for my card.
You can view the a photo of the stamp set and project details at the bottom of the post.
Here is another card I designed using this set.


We know you're going to LOVE what everyone has designed for us tonight!  So check out some of the other blogs listed below!


First, here are the links for GinaK's Current CSS Team Members:

and the links for all of the past CSS Design Team members participating:

Some of GinaK's Senior Design Team Members and Illustrators wanted to get in on the fun tonight too:

along with Nina Brackett's Guest Designer: Lisa Hjulberg

All of these gorgeous cards from the entire team will be added to the StampTV gallery throughout the next few days with the tag cssjf1 (which stands for center stage spotlight jessica fick 1)

These sketches are also our sketch challenge for this week, so be sure to check out all the information in the discussion in our Challenge group over on StampTV Thursday morning.  We'd love to see your cards with the sketch too!

Project Details :


Card #1
Paper : embossed cardstock Bazzill, Snowflake DP - Reminisce
Other : Spellbinders Die, Silver Stickles
Colorization : Prismascolor Pencils with OMS

Card #2
Paper : K&Company (gold text paper), Red and Gold glossy paper - stock
Other : Spellbinders Die, EK Success Border Punch, Gold Stickles
Ribbon : Offray
Technique : Stamp and emboss images on red glossy paper and cut ornaments.  Stamp ornaments again onto gold glossy paper, then glue red ornaments over stamped image.

Wanna see a few more idea's using this set and some of the images I didn't use?  I found some inspiration over in the StampTV Gallery!

Sunday, November 1, 2009

Moving on to Christmas!

Hi ladies.  I hope everyone had a safe and fun weekend.  I got busy designing some Christmas Cards for some challenges.  I have 3 more almost completed for other activities coming up this week.  Impression Obsession is doing their DT blog hop on Thursday (I will have to post mine on tuesday).  There is a StampTV Blog Hop on Thursday I'm participating in and I will be posting my weekly FCD project saturday.  I created Christmas Cards for all of these!  I can't wait to share them with you and I hope you have started yours, if not, then maybe you will be inspired to get started this week!
 I'm going to start out just listing the challenges and photo.  I will post details at the bottom.  So here we go!
 "Oohlala" wanted to see a Victorian Christmas Card for Challenge #39
 "Ready Set Stamp" had a long list of "ingredients" required for Challenge #8 : Christmas, use colors lilac, black, & silver, snowflakes, a 2" x 4", & crackle.


Victorian Angel Card

Inspirational Card Sketches (icsketches) - I used sketch #40
Cooking it up with Katie Challenge #4 required the following recipe :
Christmas, sparkle, and a border!


The Magic of Christmas

I found all of these challenges through "The Daily Dare" Challenge Blog.
Deb Felts is so awesome to keep up with all of this and provide this service for us!
Thanks Deb!

Project Details
Victorian Christmas Card
I think this is the first time I've done a non-traditional color Christmas card.  I really like how it turned out!  Using the 2"x 4" panel  made it a little trickier for me, I ended up with an over all card size of 6 1/4" x 4 1/4".  I had a lot of fun using UTEE to create the crackle!
Stamp Set : Inkadinkado
Paper : Vellum snowflake paper by Making Memories, purple and silver glitter paper not labeled (I picked it up at Joann's this past week), black shiney cardstock not labeled (I found it in my stash).
Ribbon: I found the really cool snowflake garland at a local stamp store - A Small Cleverness.  It's made by May Arts.  The purple sheer ribbon was purchased a local craft store.
Embellishments : Purple floral is by offray (I found it in the ribbon dept. at Joanns)
Border Punch : Martha Stewart
Title : rub-on by "royalbrush.com"

The Magic of Christmas
I decided I wanted to "get warmed up" for the StampTV Center Stage DT Blog Hop on Thursday, so I used a couple of images from "The Magic of Christmas".   I will be posting another card using this set on  Thursday.  Isn't this a beautiful stamp set!


I started with the gold blingy paper by K&Company.  I loved all the Christmas sentiments on it.  The sketched used a circle.  But never be afraid to think out of the box and substitute a different shape for a sketch.  I used one of my Spellbinders Labels Sets.  I love Spellbinders!

Stamp Set : GinaK Designs
Paper : K&Company and EK Success (gold and red)
Ribbon : unknown
Ribbon Charm : unknown
Border Punch : EK Success
Gold Stickles

Tuesday, July 28, 2009

Gina K - Many Wishes


My Gina K stamps were feeling really neglected. I stopped by the Florida Groups page over at Stamp TV and was totally motivated by an awesome Color Challenge!! So I whipped this one up!

You should have seen me digging through my inks looking for shades that match! I think I got it pretty close. Thanks my StampTV friends for all the inspiration and challenges that you take the time to give us! I'm wishing that I could work less and create more.
Related Posts Plugin for WordPress, Blogger...